ADHS-Tron - MIDI controlled Korg Monotron
The mission: My friend L's Korg Monotron should become controllable via MIDI from a DAW.
Getting Started


Arduino receives MIDI through input circuit and triggers Gate and Pitch CV inputs on Monotron. As you can hear it's not quite a major or chromatic or any scale. Arduino Uno's 8bit DAC can't output precise enough voltages for Pitch CV.
The code necessary for above described functionality:
#include <SoftwareSerial.h>
#include <MIDI.h>
#define USBserial Serial
SoftwareSerial MIDIserial(2, 4); // RX, TX

int LedInt = 13;
int PinGate = 6; // digital
int PinPitch = 9; // PWM
int PinCutoff = 10; // PWM??
bool gMidiGateOn = false;
uint8_t gMidiNoteValue = 0;
uint16_t gPitchAnalog = 0;

const uint8_t LOWEST_KEY = 24; // C2

//MIDI_CREATE_DEFAULT_INSTANCE(); // binds to default hardware port
MIDI_CREATE_INSTANCE(SoftwareSerial, MIDIserial, MIDI); // port is selectable here
//MIDI_CREATE_CUSTOM_INSTANCE(SoftwareSerial, MIDIserial, MIDI, MySettings); // altering settings

void debugNote (byte channel, byte pitch, byte velocity, uint16_t PitchAnalog) {
  USBserial.print(channel);
  USBserial.print(" ");
  USBserial.print(pitch);
  USBserial.print(" ");
  USBserial.print(velocity);
  USBserial.print(" ");
  USBserial.print(PitchAnalog);
  USBserial.println(" ");
}

void handleNoteOn(byte channel, byte pitch, byte velocity) {
  gMidiGateOn = true;
  gMidiNoteValue = pitch;
  if (pitch >= LOWEST_KEY) {
    gPitchAnalog = uint16_t((gMidiNoteValue-LOWEST_KEY)*835.666666666); // + gMidiPitchBend ;  // 8191/12
  }
  digitalWrite(LedInt, HIGH);
  digitalWrite(PinGate, HIGH);
  debugNote(channel, pitch, velocity, gPitchAnalog);
}

void handleNoteOff(byte channel, byte pitch, byte velocity) { // NoteOn messages with 0 velocity are interpreted as NoteOffs.
  digitalWrite(LedInt, LOW);
  digitalWrite(PinGate, LOW);
  //debugNote(channel, pitch, velocity);
}

void setup() {
  pinMode(LedInt, OUTPUT); // BuiltIn LED
  digitalWrite(LedInt, LOW); // LedInt off
  USBserial.begin(115200); // debugging here
  //MIDI.begin(MIDI_CHANNEL_OMNI);
  MIDI.begin(1);  // Listen to incoming messages on ch 1
  MIDI.setHandleNoteOn(handleNoteOn);
  MIDI.setHandleNoteOff(handleNoteOff);
}

void loop() {
  MIDI.read(); // Read incoming messages
}
At this point it’s about time to tell you that the snippets you see on this page are reconstructed with the help of my git history and I can’t guarantee that the program was completely working/bugfree at that particular commit. If you find something odd please leave a comment and I’m happy to help, correct it, whatever. On the bottom of this page you find a link to the final code that worked for me.
Solving the Control Voltage Problem
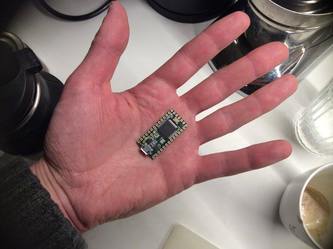
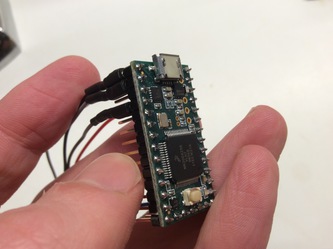
Arduino compatible code needs to be changed slightly to run on a Teensy (different serial ports and obviously pin numbers):
#include <MIDI.h>
#define USBserial Serial
#define MIDIserial Serial1

// Ableton C-2 = C0 = 00, Ableton C2 = C0 = 24; my keyb default range: 36-72
const uint8_t LOWEST_KEY = 36; // 24=C2, 36=C3
const uint8_t HIGHEST_KEY = 72; // 84=C7, 72=C6, 60=C5, 48=C4,

int LedInt = 13;
int PinGate = 2; // digital
int PinCutoff = 3; // PWM, to 30000 in setup
int PinPitch = A14; // DAC, to 30000 in setup

uint16_t gPitchAnalog = 0;

...
void setup() {
  ...
  analogWriteResolution(8); // default to 8bit PWM resolution
  analogWriteFrequency(PinCutoff, 30000);
  ...
}
...
At that time I was not quite sure how I could possibly get the pitches right, I just did not know what the volts/octave definition is for the Monotron. After hours of trial and error I came up with this formula that sounded correctly over almost a 3 octave range (the lowest 3 notes always are a bit too low if you tune your Monotron to about 10:00 o’clock):
...
uint16_t gPitchAnalog = 0;
...
gPitchAnalog = uint16_t((PitchMidi-LOWEST_KEY)*0.02577777/3.3*4096);
...
analogWrite(PIN_PITCH, gPitchAnalog);
...
Weeks later I found a little mark on the freely available Monotron schematic that might have helped :-O
whole ribbon Vbe offset
24.49mV@0deg
26.29mV@20deg
28.08mV@40deg
Beyond Pitches


Filter controlled via MIDI CC (pink line), playing around with the resonance is always fun


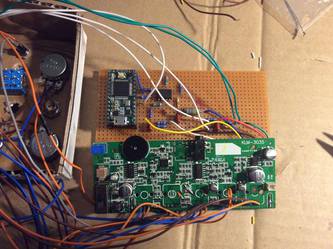
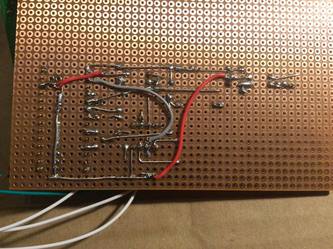
Features presented in order of appearance (If unpatient skip to 2:30 for some acidish sounds)
- Filter cutoff and resonance controlled locally
- Filter cutoff controlled via MIDI CC (pink line), resonance locally
- LFO modulating filter cutoff, amount and rate controlled locally
additional features not shown here
- Filter cutoff controlled via MIDI velocity
- LFO controlled via MIDI CC

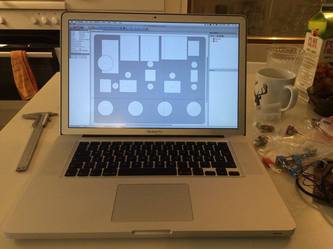


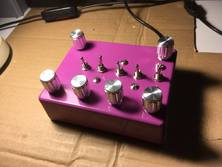
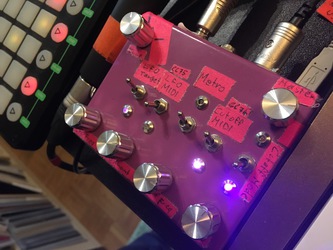
Get the final code to this project here: github.com/joj0/adhs-tron. Feel free to fork, send issues and so on!
